
DIY Exhaust System Maintenance Tips: Best Way To Prolong the Life of Your Exhaust with Routine Care
DIY Exhaust System Maintenance Tips: Prolonging the Life of Your Exhaust with Routine Care
Your vehicle's exhaust system is one of those components that's easy to forget about—until something goes wrong. A failing exhaust system doesn't just make your car loud and obnoxious; it can reduce fuel efficiency, increase harmful emissions, compromise engine performance, and even create dangerous health hazards from carbon monoxide leaks.
The good news? Regular DIY exhaust system maintenance can prevent most common exhaust problems, extend the life of expensive components like catalytic converters and mufflers, and save you hundreds or even thousands of dollars in premature replacements. With basic tools and a few hours every few months, you can keep your exhaust system in excellent condition and catch problems before they become serious.
This comprehensive guide will walk you through everything you need to know about maintaining your exhaust system at home. Whether you're a complete beginner or an experienced DIY mechanic, you'll learn practical inspection techniques, preventive maintenance strategies, and troubleshooting methods that will help you get the maximum lifespan from your exhaust components.
From understanding what each part of your exhaust system does to identifying common problems and performing routine maintenance tasks, we'll cover it all. By the end of this guide, you'll have the knowledge and confidence to maintain your exhaust system effectively and know when professional intervention is necessary.
Understanding Your Exhaust System: Components and Functions

Before diving into maintenance, it's essential to understand what you're actually maintaining. Your exhaust system is a complex network of components that work together to direct exhaust gases away from the engine, reduce noise, minimize harmful emissions, and maintain optimal engine performance.
Key Exhaust System Components
Exhaust Manifold: The journey of exhaust gases begins here. The exhaust manifold bolts directly to your engine's cylinder head and collects hot exhaust gases from multiple cylinders, channeling them into a single pipe. Manifolds are typically made of cast iron or stainless steel and must withstand extremely high temperatures (1,000°F+). Cracks in the manifold create loud ticking noises and reduce engine efficiency.
Exhaust Gaskets: These critical seals sit between the exhaust manifold and the engine block, as well as at other connection points throughout the system. Made from multi-layer steel or composite materials, gaskets prevent exhaust leaks at joints. Failed gaskets are a common source of exhaust leaks and can allow dangerous fumes into the cabin.
Oxygen Sensors (O2 Sensors): Modern vehicles have multiple oxygen sensors positioned before and after the catalytic converter. These sensors monitor oxygen levels in the exhaust gases, providing data to the engine control unit (ECU) to adjust the air-fuel mixture for optimal combustion. Contaminated or failed O2 sensors cause poor fuel economy, rough running, and check engine lights.
Catalytic Converter: This is the most expensive component in your exhaust system, often containing precious metals like platinum, palladium, and rhodium. The catalytic converter converts harmful pollutants (carbon monoxide, nitrogen oxides, and hydrocarbons) into less harmful substances (carbon dioxide, nitrogen, and water vapor) through chemical reactions. A failing catalytic converter causes reduced power, failed emissions tests, and can cost $500-$2,500 to replace.
Resonator: Not all vehicles have resonators, but when present, this component fine-tunes the exhaust note by canceling out specific sound frequencies. Resonators work with the muffler to create a more pleasant exhaust tone without restricting exhaust flow.
Muffler: The muffler's primary job is reducing exhaust noise to acceptable levels. Inside, a series of chambers, baffles, and perforated tubes force exhaust gases through a maze that dampens sound waves. Mufflers rust out from the inside because moisture and acidic combustion byproducts accumulate inside, making them one of the most commonly replaced exhaust components.
Exhaust Pipes: These pipes connect all the components, routing exhaust gases from the engine to the tailpipe. Made from aluminized steel, stainless steel, or mild steel, these pipes are vulnerable to rust, especially at joints and anywhere moisture collects. Proper hangers keep pipes from vibrating against the chassis.
Exhaust Hangers: These rubber-mounted brackets support the entire exhaust system, isolating it from the vehicle's body to prevent vibration transmission. Degraded hangers allow exhaust components to sag, creating clearance issues and potential damage.
Heat Shields: Positioned around hot exhaust components, heat shields protect the vehicle's undercarriage, fuel lines, and interior from extreme exhaust temperatures. Loose or rattling heat shields are annoying but indicate maintenance is needed.
Tailpipe: The final section where exhaust gases exit the vehicle. The tailpipe's condition is easily visible and often shows the first signs of rust and corrosion.
How the Exhaust System Works
Understanding the exhaust flow helps you appreciate why maintenance matters:
- Combustion occurs in the engine cylinders, producing hot exhaust gases (up to 1,500°F)
- Exhaust valves open, releasing these gases into the exhaust manifold
- Gases flow through the manifold into the front pipe or downpipe
- O2 sensors measure oxygen content to optimize engine performance
- The catalytic converter treats exhaust gases, reducing harmful emissions
- Additional O2 sensors monitor catalytic converter efficiency
- The resonator (if equipped) modifies sound frequencies
- The muffler quiets the exhaust note to acceptable levels
- Gases exit through the tailpipe, completing their journey
Throughout this process, the system must maintain proper pressure, prevent leaks, withstand extreme temperatures, and resist corrosion—all while bolted to a vehicle that's constantly vibrating and exposed to weather, road salt, and debris.
Why Exhaust System Maintenance Matters
Fuel efficiency: Even small exhaust leaks disrupt the carefully calibrated air-fuel mixture, reducing fuel economy by 3-10%. A clogged exhaust restricts gas flow, forcing the engine to work harder and burn more fuel.
Engine performance: Your engine needs to "breathe" properly. Restricted exhaust flow from a clogged catalytic converter or collapsed internal baffles reduces power output and can cause engine damage from excessive backpressure.
Emissions compliance: A failing exhaust system produces excessive pollutants. Most states require emissions testing, and a malfunctioning exhaust means failed tests, which means you can't legally drive the vehicle until it's repaired.
Safety: Carbon monoxide is an odorless, colorless gas that can cause serious illness or death. Exhaust leaks before the catalytic converter (where CO hasn't been converted to CO2) can allow this deadly gas to enter the cabin, especially dangerous for passengers.
Noise ordinances: Most municipalities have noise regulations for vehicles. An exhaust system with holes or a rusted-out muffler creates excessive noise that can result in tickets and fines.
Component longevity: Regular maintenance identifies minor issues before they cascade into major failures. A small rust spot caught early costs pennies to address; waiting until a pipe rusts through costs hundreds.
Resale value: A well-maintained exhaust system indicates overall vehicle care and prevents potential buyers from negotiating lower prices due to obvious exhaust problems.
Benefits of Regular DIY Exhaust Maintenance
Taking a proactive approach to exhaust system care delivers numerous advantages that extend far beyond just having a quiet vehicle.
Cost Savings
Preventing major failures: A complete exhaust system replacement can cost $800-$2,500 depending on your vehicle. Regular maintenance catches problems when they're inexpensive to fix. For example:
- Tightening a loose connection: $0 (DIY)
- Treating surface rust: $10-20 in supplies
- Replacing a rusted-through pipe: $200-600
- Replacing a damaged catalytic converter: $500-$2,500
The math is compelling—spending an hour every three months on inspection and maintenance can prevent thousands in unexpected repairs.
Improved fuel economy: As mentioned, even minor exhaust issues reduce fuel efficiency. If your vehicle averages 25 mpg and an exhaust leak reduces efficiency by 5%, you're losing 1.25 mpg. At 12,000 miles per year and $3.50 per gallon, that's about $168 annually just from a leak you could have fixed.
Avoiding emergency repairs: Exhaust problems rarely occur at convenient times. They happen on road trips, before important appointments, or when finances are tight. Preventive maintenance means choosing when to address issues rather than dealing with emergencies.
Enhanced Performance
Optimal engine breathing: Your engine is essentially an air pump. Restricted exhaust flow reduces engine efficiency, power output, and responsiveness. Maintaining clear exhaust passages keeps your engine performing as designed.
Proper air-fuel mixture: Exhaust leaks confuse oxygen sensors, causing the engine computer to make incorrect fuel adjustments. This creates rough idling, hesitation, and reduced power. A well-sealed exhaust system ensures proper sensor readings and optimal performance.
Reduced backpressure: Blocked or restricted exhaust components create backpressure that fights against the engine's exhaust stroke, robbing power and efficiency. Regular maintenance identifies restrictions before they become severe.
Environmental Responsibility
Reduced emissions: A properly functioning exhaust system, particularly the catalytic converter, dramatically reduces harmful pollutants. Maintenance ensures these components work as designed, minimizing your environmental impact.
Fuel efficiency equals lower carbon footprint: Better fuel economy means burning less gasoline, which directly reduces your carbon dioxide emissions.
Proper disposal: DIY maintenance often identifies components that need replacement. Proper recycling of old exhaust parts, especially catalytic converters with their precious metals, helps environmental sustainability.
Safety Assurance
Carbon monoxide protection: Regular leak detection prevents potentially deadly carbon monoxide from entering your cabin. This is especially critical for vehicles with exhaust components near the firewall or in poor condition.
Fire prevention: Exhaust systems generate extreme heat. Components that have degraded and are contacting other parts of the vehicle can cause fires. Proper hangers and alignment prevent this risk.
Avoiding sudden failures: An exhaust pipe that falls off while driving creates immediate safety hazards—from dangerous noise levels to potential carbon monoxide exposure to the pipe itself creating road hazards for other drivers.
Peace of Mind
Confidence in your vehicle: Knowing your exhaust system is in good condition provides confidence that your vehicle is safe and reliable.
Avoiding inspection failures: Regular maintenance ensures you'll pass emissions and safety inspections without surprises or additional expense.
Planning repairs on your schedule: When you inspect regularly, you can identify developing problems and plan repairs during convenient times with your chosen mechanic at your price point, rather than accepting whatever emergency pricing a shop charges when your exhaust fails unexpectedly.
Essential Tools and Supplies for DIY Exhaust Maintenance
Proper tools make exhaust maintenance safer, easier, and more effective. While you can accomplish basic inspection with minimal equipment, having the right tools expands what you can do yourself.
Basic Tools (Essential)
Floor jack (2-3 ton capacity): Necessary for lifting your vehicle safely to access the exhaust system. Hydraulic floor jacks are easier to use than scissor jacks. Budget: $50-150 for a quality floor jack.
Jack stands (rated for your vehicle weight): Never work under a vehicle supported only by a jack. Jack stands are essential safety equipment. Always use jack stands in pairs, and consider owning two pairs for maximum stability. Budget: $30-80 for a quality pair.
Wheel chocks: Prevent vehicle rolling while elevated. Place chocks at the wheels remaining on the ground. Budget: $10-25.
Flashlight or work light: Exhaust systems are in dark, shadowy areas. A bright LED work light or headlamp is essential for thorough inspection. Magnetic base work lights are particularly useful. Budget: $15-50.
Inspection mirror: A telescoping inspection mirror helps you see areas that would otherwise require contortions or component removal. Budget: $10-25.
Gloves: Protect your hands from sharp edges, rust, and dirt. Nitrile gloves offer good protection and tactile sensitivity. Budget: $10-20 for a box.
Wire brush: Essential for removing rust and corrosion. A set with various sizes is useful. Budget: $8-20.
Rags or shop towels: For cleaning and drying components. Budget: $10-20.
Penetrating oil: Products like PB Blaster, Liquid Wrench, or WD-40 Specialist help free rusted bolts and threads. Budget: $8-15 per can.
Intermediate Tools (Recommended)
Socket set (SAE and metric): Exhaust components use various bolt sizes. A comprehensive socket set (1/4", 3/8", and 1/2" drive) handles most needs. Budget: $50-200 depending on quality.
Wrench set: Combination wrenches (open and box end) provide versatility for tight spaces. Budget: $30-100.
Ratcheting wrenches: These make working in tight spaces much easier. Budget: $50-150.
Pliers set: Including regular, needle-nose, and locking pliers for various tasks. Budget: $25-60.
Pry bar or exhaust spreader: Helps separate exhaust components at slip joints. Budget: $15-40.
Rubber mallet: For persuading stubborn components without damage. Budget: $10-20.
Safety glasses: Protect your eyes from falling rust, debris, and chemicals. Budget: $5-20.
Creeper: Makes sliding under the vehicle much more comfortable. Budget: $30-80.
Digital multimeter: For testing oxygen sensors and other electrical components. Budget: $20-60.
Advanced Tools (Optional but Useful)
Oxygen sensor socket: Specialized socket with a slot for the sensor wire, making O2 sensor removal much easier. Budget: $10-25.
Torque wrench: Ensures proper bolt tension when reassembling. Budget: $30-150.
Exhaust pipe cutter: Makes clean cuts when replacing sections. Budget: $30-80.
Angle grinder: For cutting rusted bolts or exhaust pipes. Budget: $40-100.
Wire wheel for drill: Attaches to a drill for efficient rust removal. Budget: $10-30.
Infrared thermometer: Checks exhaust temperatures to identify restrictions or catalytic converter problems. Budget: $20-50.
OBD-II scanner: Reads diagnostic codes related to exhaust and emissions systems. Budget: $25-300 depending on features.
Maintenance Supplies
High-temperature exhaust paint: Protects against rust and corrosion. Choose flat black or aluminum-colored paint rated for 1200°F+. Budget: $8-15 per can.
Anti-seize compound: Prevents exhaust bolts from seizing due to heat and corrosion. Budget: $8-20 per container.
Exhaust sealant: High-temperature sealant for minor leaks at joints. Budget: $8-15 per tube.
Rust converter: Converts rust to a stable compound before painting. Budget: $10-25.
Degreaser or automotive soap: For cleaning components. Budget: $8-20.
Steel wool (various grades): For rust removal. Budget: $5-15.
Sandpaper (various grits): For surface preparation before painting. Budget: $10-20.
Exhaust wrap (optional): Thermal wrap can protect components and reduce heat radiation. Budget: $20-50 per roll.
Safety Equipment
Safety glasses: Non-negotiable. Budget: $5-20.
Work gloves: Protect from cuts, abrasions, and chemicals. Budget: $10-25.
Respirator or dust mask: Protects against rust particles, especially when using wire brushes or grinding. Budget: $20-60 for a quality respirator.
Hearing protection: If using power tools. Budget: $5-30.
Fire extinguisher: Keep one accessible when working on exhaust systems. Budget: $20-50.
First aid kit: For minor cuts and injuries. Budget: $15-40.
Budget-Friendly Approach
If you're just starting out, you can begin with minimal investment:
Minimum kit ($150-250):
- Basic floor jack and jack stands
- Flashlight
- Wire brush
- Penetrating oil
- High-temperature exhaust paint
- Basic tools you likely already own (adjustable wrench, screwdrivers)
- Safety glasses and gloves
Add tools as needs and budget allow. Many auto parts stores offer tool loaner programs for specialized equipment.
Step-by-Step DIY Exhaust System Maintenance
Now let's dive into the practical maintenance tasks you can perform to keep your exhaust system in excellent condition.
Pre-Maintenance Safety Procedures
Before beginning any work, follow these critical safety steps:
1. Work in a well-ventilated area: Exhaust gases are toxic. Never run the engine in an enclosed space. Work outdoors or in a well-ventilated garage with doors open.
2. Allow cooling time: Exhaust systems retain heat for extended periods. After driving, wait at least 30-60 minutes before working on the exhaust to avoid serious burns.
3. Park on level, solid ground: Never jack a vehicle on sloped or soft surfaces. Use concrete or asphalt.
4. Engage parking brake and chock wheels: Prevent rolling by engaging the parking brake and placing wheel chocks behind wheels that will remain on the ground.
5. Wear appropriate safety equipment: Safety glasses, gloves, and long sleeves protect against injuries.
6. Never rely on the jack alone: Always use properly rated jack stands. Jacks can fail, causing serious injury or death.
7. Have a fire extinguisher nearby: Exhaust systems are hot and involve flammable materials.
8. Keep children and pets away: The work area should be clear of distractions and hazards to others.
Task 1: Comprehensive Visual Inspection
Frequency: Every 3 months or 3,000-5,000 miles
Time required: 30-45 minutes
Difficulty: Easy
A thorough visual inspection is the foundation of exhaust maintenance. Most problems show visible signs before they become serious.
Step-by-step process:
1. Safely elevate the vehicle: Use your floor jack at the manufacturer's recommended lift points (consult your owner's manual). Lift one end of the vehicle, place jack stands, and lower the vehicle onto the stands. Verify stability before proceeding. For complete access, repeat for the opposite end.
2. Start at the front: Begin your inspection at the exhaust manifold where it connects to the engine.
3. Examine the exhaust manifold:
- Look for cracks, especially on cast iron manifolds
- Check for warping (gaps between manifold and engine)
- Inspect studs and bolts for rust or damage
- Look for signs of exhaust leaks: soot, carbon buildup, or white/gray deposits
4. Inspect all gasket locations:
- Check where the manifold meets the engine
- Examine joints between pipes
- Look at the connection points for the catalytic converter
- Check the muffler connections
- Signs of gasket failure include soot trails, carbon deposits, or visible gaps
5. Examine oxygen sensors:
- Check sensor wiring for damage or fraying
- Look for excessive carbon buildup on sensors
- Verify sensors are securely mounted
- Note any sensor that appears corroded or damaged
6. Thoroughly inspect the catalytic converter:
- Look for dents or physical damage (common from road debris or low clearance)
- Check for discoloration (blue or extremely brown coloring indicates overheating)
- Examine heat shields for security
- Look for cracks or signs of internal failure
- Check mounting points
7. Inspect all pipes and connections:
- Follow each section of pipe from manifold to tailpipe
- Look for rust, particularly at seams and low points where moisture collects
- Check clamps and flanges for tightness
- Examine pipe walls for thinning (poke suspect areas gently with a screwdriver—if it goes through easily, replacement is needed)
- Look for damage from road debris impacts
8. Examine the muffler:
- Check for rust, especially on the bottom and at seams
- Look for holes or cracks
- Check mounting points and hangers
- Tap the muffler gently—rattling indicates internal baffle deterioration
- Look for rust stains or wetness indicating internal condensation issues
9. Inspect exhaust hangers:
- Check rubber hangers for cracking, tearing, or deterioration
- Verify all components are properly supported
- Look for hangers that have pulled away from mounting points
- Note any excessive sagging indicating failed hangers
10. Check heat shields: - Verify all heat shields are present and secure - Look for rust or deterioration - Test for looseness (rattling heat shields are common noise sources) - Ensure shields aren't contacting exhaust components improperly
11. Examine the tailpipe: - Check for rust and corrosion - Look at the exhaust tip for carbon buildup patterns - Heavy black carbon indicates rich mixture - White deposits suggest coolant entering exhaust - Blue/gray deposits may indicate oil burning
12. Document your findings: Take photos or notes of anything concerning. This creates a baseline for future comparisons and helps track problem progression.
What to look for specifically:
Surface rust: Light, powdery rust on the outside is normal, especially in humid or salt-exposed areas. This is manageable with wire brushing and protective coatings.
Structural rust: Rust that has created holes or thinned walls significantly requires component replacement. Test suspect areas by pushing with a screwdriver—if it penetrates, the component is compromised.
Soot trails: Black sooty deposits around joints indicate exhaust leaks at those connections.
Moisture or rust staining: Running down from joints or weep holes in mufflers indicates internal condensation, which is normal but accelerates rust.
Discoloration: Blue or rainbow coloring indicates extreme heat exposure, suggesting problems with air-fuel mixture, catalytic converter, or exhaust restriction.
Physical damage: Dents, scrapes, or bent pipes from bottoming out, road debris, or accidents.
Loose components: Anything that moves when you push on it (except where designed to flex on hangers).
Task 2: Detecting and Locating Exhaust Leaks
Frequency: Every 3 months or whenever you hear unusual sounds
Time required: 20-30 minutes
Difficulty: Easy
Exhaust leaks are among the most common problems and can range from minor annoyances to serious safety hazards.
Method 1: Visual and auditory inspection
1. Cold start test: With the vehicle still elevated on jack stands, have a helper start the engine while you're safely positioned underneath.
2. Listen carefully: Exhaust leaks produce distinctive hissing, ticking, or popping sounds, especially during cold starts when gaps are largest.
3. Systematically listen along the entire system: Start at the manifold and work toward the tailpipe, getting your ear close to components (but not touching—remember they heat up quickly).
4. Feel for air movement: Carefully move your hand near suspected leak areas (without touching hot components). You may feel exhaust gases escaping.
5. Look for visible indicators:
- Dancing or vibrating gaskets
- Soot or carbon around leak areas
- Visible gaps or cracks
Method 2: Smoke test (professional method adaptable for DIY)
While professional smoke machines are expensive, you can create a simple version:
1. Block the tailpipe: Use a rag or rubber stopper to partially block the exhaust outlet (never fully block it).
2. Create smoke: Some DIYers use smoke from a extinguished candle or incense stick near the intake (though this is controversial and potentially harmful to sensors).
3. Watch for smoke escaping: Any smoke emerging from locations other than where it should indicates leaks.
Note: This method is less recommended due to potential sensor contamination. Visual and auditory inspection is usually sufficient.
Method 3: Soapy water test
1. Mix solution: Create soapy water (dish soap and water in a spray bottle).
2. Apply to suspect areas: With the engine running, spray soapy water on joints, gaskets, and suspected leak locations.
3. Watch for bubbles: Escaping exhaust will create bubbles in the soap solution, revealing leak locations.
Common leak locations:
- Exhaust manifold gasket (very common, especially on older vehicles)
- Exhaust manifold cracks (particularly on cast iron manifolds)
- Donut gasket between manifold and catalytic converter
- Flex pipe (if equipped) often develops leaks
- Welded joints, especially on aftermarket exhaust components
- Muffler seams and ends
- Slip joints where pipes connect
- Anywhere rust has created holes
Leak severity assessment:
Minor leaks: Small leaks at joints or minor rust holes
- Impact: Slight noise, minimal performance impact
- Urgency: Repair within a few weeks
- DIY solution: Exhaust sealant or clamp repair may work temporarily
Moderate leaks: Larger holes, failing gaskets, or multiple minor leaks
- Impact: Noticeable noise, reduced performance, fuel economy impact
- Urgency: Repair within days
- Solution: Usually requires component replacement or professional welding
Severe leaks: Large holes, broken connections, or leaks before catalytic converter
- Impact: Very loud, significant performance loss, safety hazard from CO exposure
- Urgency: Immediate repair needed
- Solution: Professional repair required; vehicle should not be driven extensively
Task 3: Cleaning the Exhaust System
Frequency: Every 6 months or as needed
Time required: 1-2 hours
Difficulty: Easy to moderate
Cleaning prevents corrosion and allows you to better inspect for problems.
Exterior cleaning process:
1. Ensure complete cooling: Never clean hot exhaust components. Allow several hours of cooling time.
2. Prepare cleaning solution: Mix automotive degreaser or car wash soap with water according to product directions. For heavy grime, use undiluted degreaser.
3. Pre-rinse: If possible, spray or wipe down the exhaust with water to remove loose dirt and debris.
4. Apply cleaning solution:
- Use a spray bottle or cloth to apply cleaner to all external surfaces
- Pay special attention to areas near wheels where road grime accumulates
- Don't forget heat shields and mounting brackets
5. Agitate stubborn deposits:
- Use a soft brush for light deposits
- Use a wire brush for heavier buildup or surface rust
- Scrub in circular motions
- Be thorough at joints where dirt hides
6. Target specific problem areas:
- Road salt deposits (common in winter climates): Scrub thoroughly and rinse well
- Oil and grease: May need multiple applications of degreaser
- Exhaust soot: Usually requires wire brushing
7. Rinse thoroughly: Use a hose or spray bottle with clean water to remove all cleaning solution. Cleaner left on can trap moisture and promote rust.
8. Dry completely:
- Use clean shop towels to dry all surfaces
- Pay attention to joints and crevices where water pools
- Consider using compressed air to blow out water from hard-to-reach areas
- Let air dry in the sun if possible
9. Inspect while clean: A clean exhaust reveals problems more easily. Look for rust, cracks, or damage while everything is visible.
Interior cleaning considerations:
You generally can't and shouldn't clean inside exhaust components:
Catalytic converter: Never attempt to clean internally. Contamination requires replacement. Some products claim to clean catalytic converters from the fuel tank, but effectiveness is questionable.
Muffler internals: Not accessible or cleanable. Internal rust is why mufflers fail.
Exhaust pipes: The hot gases clean these naturally during operation. Internal carbon buildup from incomplete combustion indicates engine problems, not exhaust cleaning needs.
Oxygen sensors: Can sometimes be cleaned with specific cleaner products, but replacement is usually more reliable. Never use solvents or scrub sensors.
Special cleaning situations:
After off-road use: Mud, dirt, and debris pack into exhaust components and hangers. Thorough cleaning prevents accelerated corrosion.
After winter: Road salt is extremely corrosive. Spring cleaning removes accumulated salt before summer heat accelerates corrosion.
Before undercoating: If applying rust protection or undercoating, clean thoroughly first for proper adhesion.
Used vehicle purchase: Clean the exhaust to establish a baseline and identify any hidden problems.
Task 4: Rust Treatment and Prevention
Frequency: As needed when rust is detected; preventive coating every 6-12 months
Time required: 1-3 hours depending on rust severity
Difficulty: Easy to moderate
Rust is the exhaust system's greatest enemy. Proactive rust treatment dramatically extends component life.
Assessment phase:
1. Identify rust type and severity:
Surface rust: Light, powdery, reddish-brown coating
- Status: Early stage, easily treatable
- Action: Clean and protect
Scale rust: Thicker, flaking rust that creates texture
- Status: Moderate concern, requires more aggressive treatment
- Action: Remove thoroughly and seal
Penetrating rust: Rust has created pinholes or significantly thinned metal
- Status: Component compromise; replacement likely needed
- Action: Immediate replacement; too far gone for treatment
2. Test structural integrity: Use a flathead screwdriver to gently probe rusted areas:
- Solid resistance: Structure intact, treatable
- Easy penetration: Metal compromised, replacement needed
Rust removal process:
1. Gather supplies:
- Wire brushes (hand and/or drill-mounted)
- Sandpaper (80-220 grit)
- Rust converter
- High-temperature exhaust paint
- Degreaser
- Clean rags
- Gloves and safety glasses
2. Clean the rusted area:
- Remove dirt, oil, and loose debris with degreaser
- Dry completely
3. Remove loose rust mechanically:
- Use wire brush to remove all loose rust particles
- For stubborn rust, use coarser sandpaper (80-120 grit)
- Brush until you reach solid metal
- Use drill-mounted wire wheels for larger areas (wear eye protection—rust particles fly everywhere)
- Feather edges where rust meets solid metal for smooth transitions
4. Clean again: Remove all rust dust and particles
- Wipe with degreaser or clean cloth
- Let dry completely
5. Apply rust converter (optional but recommended):
- Follow product directions
- Usually involves brushing or spraying converter onto remaining rust spots
- Converter chemically transforms rust into a stable compound
- Allow full drying time (typically 24-48 hours)
- Creates a paintable surface
6. Final surface prep:
- Lightly sand converted rust or bare metal with 220-grit sandpaper
- Wipe clean and dry
Protective coating application:
1. Choose appropriate paint:
- Must be high-temperature exhaust paint (rated 1200°F+)
- Available in spray cans or brush-on
- Colors: typically flat black or aluminum
- Some products offer ceramic or high-heat formulations for extreme durability
2. Prepare for painting:
- Ensure surface is completely clean and dry
- Mask surrounding areas if needed (though overspray on chassis is generally not a concern)
- Work in well-ventilated area
- Wear respirator when spray painting
3. Apply paint:
- Shake spray cans thoroughly (2-3 minutes)
- Hold can 8-12 inches from surface
- Apply in thin, even coats using sweeping motions
- Better to apply multiple thin coats than one heavy coat
- Wait 10-15 minutes between coats
- Apply 2-4 coats for best protection
- For brush-on: apply evenly, following product directions
4. Curing:
- Allow initial drying per product directions (usually 1-4 hours)
- Most high-temp paints require heat curing
- Start engine and let warm up gradually
- Take a short drive to fully cure paint
- Expect smoke and odor during first heating—this is normal
- After cooling, inspect coverage
Advanced rust prevention strategies:
Undercoating/rust prevention sprays: Products like Fluid Film or similar rust prevention sprays can be applied to the entire exhaust:
- Creates a protective barrier against moisture and salt
- Must use products rated for high heat on exhaust components
- Reapply annually, especially in rust-prone climates
- Focus on areas most exposed to road spray
Ceramic coatings: Professional-grade ceramic exhaust coatings offer superior protection:
- Extremely durable and heat-resistant
- Expensive (usually professional application)
- Consider for high-value vehicles or extreme environments
Improved drainage: Some exhaust modifications can improve water drainage:
- Drill small weep holes at low points in pipes (controversial; can accelerate rust at holes)
- Ensure hangers position components for proper drainage
Regular driving: Moisture inside exhaust components promotes rust. Regular highway driving brings exhaust to full temperature, evaporating internal moisture.
Task 5: Checking and Maintaining Proper Alignment
Frequency: Every 6 months or after any suspension work
Time required: 30-45 minutes
Difficulty: Easy to moderate
Proper alignment prevents rattles, wear, and potential damage from components contacting the chassis.
Alignment inspection process:
1. Visual alignment check:
- With vehicle on jack stands, look at the entire exhaust system from multiple angles
- Pipes should follow their intended path without visible bends or sags
- Components should be roughly centered in their spaces
- Nothing should be twisted or obviously misaligned
2. Check clearances:
- Measure gaps between exhaust and chassis (minimum 1 inch recommended)
- Check clearance from fuel lines, brake lines, and wiring
- Verify clearance from suspension components
- Ensure adequate clearance from body panels and frame
- Check ground clearance if your vehicle sees off-road use
3. Inspect hangers and mounts:
- Check each rubber hanger for condition
- Look for cracks, tears, or stretching
- Verify hangers are properly engaged in mounting brackets
- Check that no hangers have pulled free from components
4. Test for movement:
- Gently push on various exhaust components
- Some movement is normal—rubber hangers provide isolation
- Excessive movement or components that don't return to position indicates problems
- Listen for rattling or contact with chassis when pushing
5. Check mounting bolts and clamps:
- Inspect all clamps for tightness
- Check bolts at flanges and mounting points
- Look for loose or missing hardware
- Verify clamps haven't worked loose from vibration
Correcting alignment issues:
Adjusting hanger positions:
1. Identify the misalignment: Determine which direction components need to move.
2. Loosen nearby clamps slightly: This allows some pipe movement.
3. Reposition components: Gently push, pull, or pry components into correct position.
4. Verify clearances: Check all clearances before tightening.
5. Tighten clamps: Secure components in new position.
6. Test movement: Ensure proper flex remains without excessive movement.
Replacing worn hangers:
1. Support the exhaust: Use a jack stand or have a helper hold the component.
2. Remove old hanger:
- Pull rubber hanger off mounting points
- May need to cut severely deteriorated hangers
- Use penetrating oil on stubborn connections
3. Install new hanger:
- Apply slight soap or lubricant to ease installation
- Work one end onto mount, then the other
- Ensure full engagement on both mounting points
4. Verify position: Check that component returns to correct position with proper clearance.
Tightening loose connections:
Clamp-type connections:
- Loosen slightly, ensure pipes are fully engaged
- Align properly
- Tighten progressively—don't overtighten
- Many clamps have specified torque values
Flange connections:
- Check gasket condition
- Clean mating surfaces if re-sealing
- Tighten bolts in star pattern to ensure even pressure
- Replace rusted or damaged hardware
- Use anti-seize on threads
Common alignment problems and solutions:
Problem: Exhaust rattles against chassis
- Cause: Worn hangers, loose connections, or improper installation
- Solution: Replace hangers, adjust position, tighten connections
Problem: Exhaust sags low
- Cause: Failed hangers or damaged pipes
- Solution: Replace hangers; if pipes are bent, replacement may be needed
Problem: Exhaust contacts frame or body
- Cause: Alignment issues from impact, worn hangers, or bent components
- Solution: Realign system; replace damaged parts if necessary
Problem: Exhaust vibrates excessively
- Cause: Loose mounts, broken hangers, or improperly secured components
- Solution: Tighten all connections, replace failed hangers
Task 6: Monitoring Exhaust System Performance
Frequency: Continuously while driving; formal checks every 3-6 months
Time required: 15-20 minutes for formal testing
Difficulty: Easy to moderate
Performance monitoring catches problems before they become obvious failures.
Auditory monitoring:
Normal exhaust sound: Consistent, muffled tone that's louder during acceleration
Problem indicators:
- Hissing or ticking (especially on cold starts): Exhaust leak, likely at manifold or gasket
- Loud rumbling: Muffler failure or large leak
- Rattling: Loose heat shields, broken internal baffles, or loose components
- Popping or backfiring: Exhaust leak or engine timing issues
- Whistling: Restriction or partially blocked passage
Visual monitoring (exhaust appearance):
Check tailpipe deposits and smoke color:
Normal: Slight black carbon (typical), clear exhaust
- Status: System operating correctly
Heavy black smoke:
- Indication: Rich fuel mixture, clogged air filter, or fuel system problem
- Action: Address engine tuning; this accelerates catalyst damage
Blue-gray smoke:
- Indication: Oil burning (worn rings, valve seals, or turbo failure)
- Action: Engine repair needed; oil fouls catalytic converter
White smoke (especially sweet-smelling):
- Indication: Coolant entering combustion (head gasket, cracked head)
- Action: Immediate engine attention needed; can destroy catalyst
Performance indicators:
Reduced power or acceleration:
- Possible cause: Restricted exhaust from failed catalytic converter or collapsed internal baffles
- Test: Compare current performance to normal baseline
Decreased fuel economy:
- Possible cause: Exhaust leaks confusing O2 sensors, or restrictions forcing engine to work harder
- Track: Monitor fuel economy; drops of 10%+ warrant investigation
Rough idling or stalling:
- Possible cause: Exhaust leaks affecting sensor readings or severe restrictions causing backpressure
- Note: May also cause check engine light
Smell of exhaust in cabin:
- Possible cause: Exhaust leak before catalytic converter (contains CO)
- Urgency: Immediate attention—carbon monoxide hazard
- Action: Stop driving; have towed to repair facility
Check engine light diagnostics:
Many exhaust problems trigger the check engine light:
Common exhaust-related codes:
- P0420/P0430: Catalyst efficiency below threshold (worn catalyst or O2 sensor issues)
- P0171/P0174: System too lean (may indicate exhaust leak before O2 sensor)
- P0131-P0141: O2 sensor circuit problems
- P0420: Catalytic converter efficiency
Using an OBD-II scanner:
- Plug scanner into OBD port (usually under dashboard)
- Turn ignition to ON (engine off)
- Read codes and note descriptions
- Research codes to understand implications
- Clear codes after repairs to verify fix
Temperature testing (advanced):
Using an infrared thermometer:
1. Warm up engine: Drive until fully at operating temperature
2. Measure temperatures:
- Before catalytic converter: ~400-900°F
- After catalytic converter: Should be 100-200°F+ hotter
- Along pipes: Gradual temperature decrease toward tailpipe
3. Interpret results:
- Much cooler after catalyst: Catalyst not functioning (not lighting off)
- Same temperature before and after: Catalyst not working
- Excessive temperatures: Possible restriction or engine running too rich
- Very hot single section: Possible restriction downstream
Backpressure testing (advanced):
Excessive backpressure indicates restrictions:
Method 1: Vacuum gauge:
- Connect vacuum gauge to manifold vacuum port
- Engine at idle should show 18-22 inches of vacuum (varies by vehicle)
- Rev to 2000 RPM; vacuum should remain stable or drop slightly
- If vacuum drops significantly, excessive backpressure exists
Method 2: Pressure gauge (requires removing O2 sensor):
- Install pressure gauge in O2 sensor bung
- Backpressure at 2000 RPM should be under 2 PSI
- Over 3 PSI indicates restriction requiring investigation
Seasonal Exhaust Maintenance Considerations
Different seasons present unique challenges for exhaust systems. Adapting your maintenance routine to seasonal conditions extends component life.
Winter Maintenance
Pre-winter preparation:
1. Thorough inspection: Check for any weaknesses before cold weather stress begins.
2. Rust treatment: Address any rust spots before winter moisture and salt exposure.
3. Protective coating: Apply rust prevention products before winter to protect against road salt.
4. Check heat shields: Verify all heat shields are secure to protect against increased heat in cold weather (engines run richer when cold).
Winter-specific concerns:
Road salt exposure: Salt is extremely corrosive to exhaust components:
- Underbody spray frequently washes away salt
- Focus on post-winter cleaning
- Consider additional protective coatings in salt-heavy regions
Condensation issues: Cold weather increases internal condensation:
- Take longer drives to fully heat exhaust (evaporates moisture)
- Short trips where exhaust never gets fully hot accelerate rust
- Notice increased water dripping from tailpipe (normal in winter)
Thermal stress: Repeated heating/cooling cycles stress metal:
- Cracks may develop or worsen in cold weather
- Listen for changes in exhaust note indicating new leaks
Snow and ice accumulation:
- Ice/snow can pack around hangers and shields
- Check for damage after driving through deep snow
- Ensure exhaust pipes have adequate ground clearance
Post-winter maintenance:
Thorough cleaning: Remove accumulated road salt as soon as weather permits.
Detailed inspection: Look for accelerated rust from salt exposure.
Rust treatment: Address any new rust before summer heat accelerates deterioration.
Summer Maintenance
Pre-summer preparation:
1. Clean thoroughly: Remove winter grime and salt residue.
2. Inspect for heat damage: Check for any components that may have been weakened.
3. Verify cooling: Ensure heat shields are in place to protect underbody components from summer heat.
Summer-specific concerns:
Extreme heat exposure: Summer sun heats both the exhaust and the entire vehicle:
- Additional stress on rubber hangers (check more frequently)
- Accelerated rust progression if moisture present
- Paint may cure further or potentially peel if low quality
Increased driving: Summer often means more miles (road trips):
- More wear on all components
- Increased likelihood of road debris impacts
- Greater exposure to various road conditions
Off-road use: If you take summer off-road trips:
- Check ground clearance before trails
- Inspect after each trip for damage
- Clean packed mud/dirt immediately
Fall Maintenance
Pre-winter preparation mode:
1. Comprehensive inspection: Identify any problems to address before winter.
2. Address all repairs: Don't let minor issues become major problems in winter conditions.
3. Apply protective coatings: Last chance before winter salt exposure.
4. Replace worn hangers: Don't let them fail during winter when roadside repairs are miserable.
Common Exhaust System Problems: Identification and Solutions
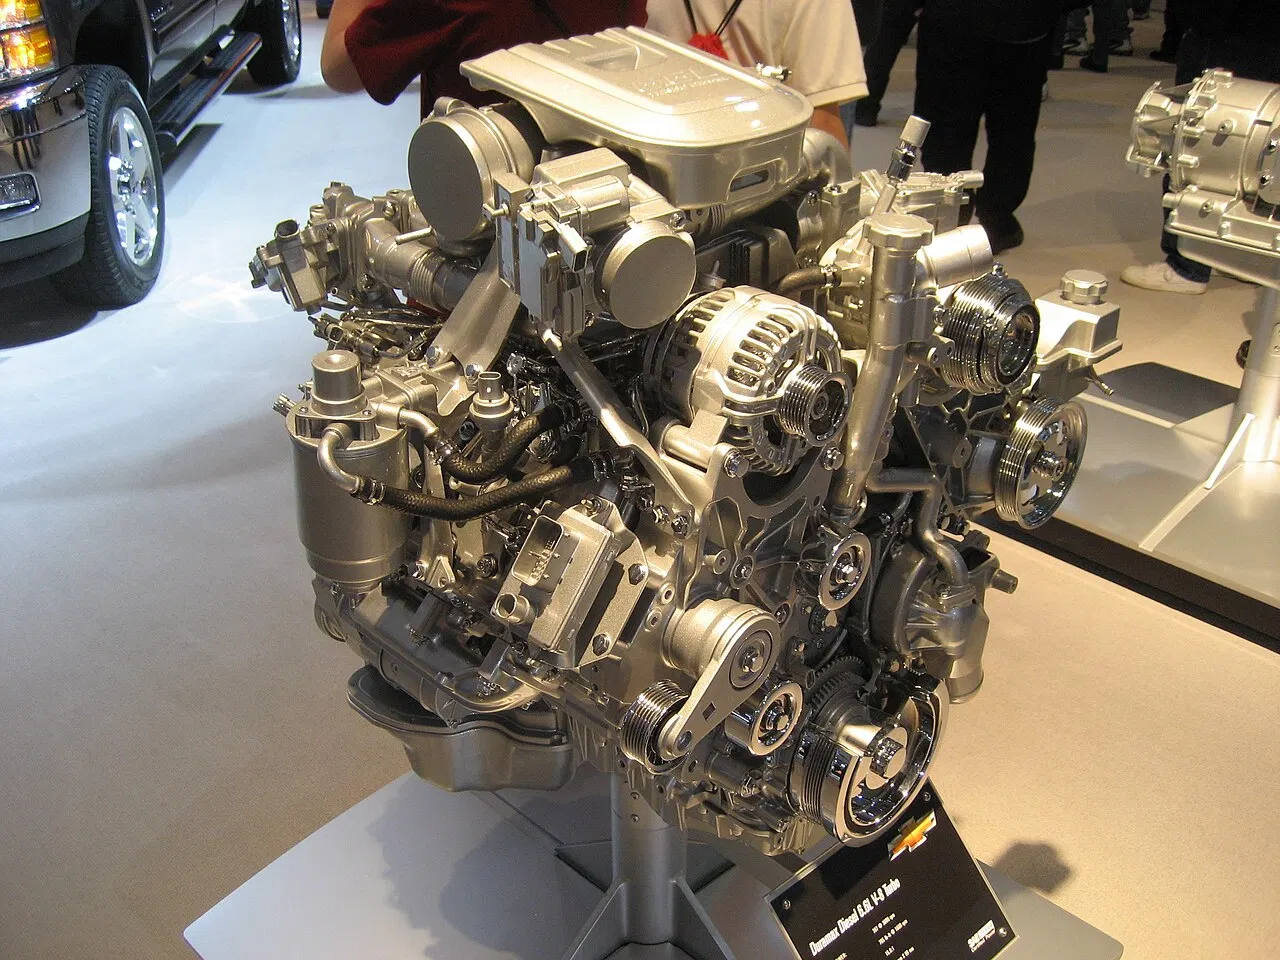
Understanding common exhaust problems helps you identify issues quickly and determine appropriate responses.
Problem 1: Exhaust Leaks
Symptoms:
- Hissing, ticking, or tapping sounds, especially when cold
- Louder exhaust note
- Smell of exhaust fumes
- Visible soot around connections
- Check engine light (if leak affects O2 sensor readings)
Common causes:
- Failed gaskets
- Cracked manifold
- Rusted-through pipes
- Loose connections
- Failed flex pipe
DIY diagnosis:
- Listen for leak location during cold start
- Look for soot trails indicating leak points
- Use soapy water test on suspected areas
DIY solutions:
- Minor leaks at joints: Exhaust sealant may provide temporary fix
- Loose connections: Tighten clamps or replace gaskets
- Small holes: Exhaust tape or patch kits (temporary solutions)
When to seek professional help:
- Manifold gasket or cracked manifold (requires engine work)
- Major rust holes requiring pipe replacement
- Leaks in hard-to-access locations
- Multiple leak points
Prevention:
- Regular inspection catches leaks early
- Rust prevention stops holes from forming
- Proper tightening prevents gasket failure
- Quality components last longer
Problem 2: Excessive Rust and Corrosion
Symptoms:
- Visible rust on exhaust components
- Flaking metal
- Holes in pipes or muffler
- Thinning pipe walls
- Structural weakness
Common causes:
- Moisture exposure (especially internal)
- Road salt
- Short trips preventing moisture evaporation
- Age
- Poor quality materials
DIY diagnosis:
- Visual inspection reveals rust
- Screwdriver test shows metal integrity
DIY solutions:
- Surface rust: Wire brush, rust converter, protective paint
- Moderate rust: Same treatment with more aggressive removal
- Severe rust: Component replacement required
When to seek professional help:
- Rust has created structural weakness
- Multiple components need replacement
- Welding required
- Safety-critical components affected
Prevention:
- Regular cleaning removes corrosive materials
- Protective coatings prevent rust formation
- Longer drives evaporate internal moisture
- Post-winter cleaning removes salt
Problem 3: Failed or Damaged Catalytic Converter
Symptoms:
- Check engine light (code P0420 or P0430)
- Reduced engine performance
- Failed emissions test
- Rattling from catalyst (internal failure)
- Excessive heat from catalyst
- Rotten egg smell
Common causes:
- Contamination (oil, coolant, excess fuel)
- Engine misfires damaging catalyst
- Road impact damage
- Overheating
- Age (typical lifespan: 70,000-100,000+ miles)
DIY diagnosis:
- Read diagnostic codes with OBD scanner
- Check for rattling (shake catalyst gently)
- Visual inspection for damage
- Temperature testing (inlet vs. outlet)
DIY solutions:
- Limited DIY options for failed catalysts
- Address underlying causes (fix engine issues causing contamination)
- Ensure proper air-fuel mixture
- Replace if confirmed failed
When to seek professional help:
- Catalyst replacement required (expensive, $500-$2,500)
- Diagnosis unclear
- Welding or cutting required for replacement
Prevention:
- Maintain engine properly (address misfires immediately)
- Don't ignore check engine lights
- Use correct oil specifications
- Fix coolant and oil leaks promptly
- Avoid running on extremely rich mixture
Problem 4: Muffler Failure
Symptoms:
- Very loud exhaust note
- Rattling or thumping from muffler
- Visible rust holes in muffler
- Water or rust staining from muffler
- Dragging muffler
Common causes:
- Internal rust (most common)
- External rust and corrosion
- Road impact damage
- Age
- Condensation accumulation
DIY diagnosis:
- Visual inspection shows obvious damage
- Rattling indicates internal baffle failure
- Loud exhaust confirms muffler perforation
DIY solutions:
- Minor holes: Temporary patches or sealant
- Internal failure: Replacement required
- Loose muffler: Check and replace hangers
When to seek professional help:
- Muffler replacement (requires cutting and welding or specialized tools)
- System is too rusty to separate for muffler access
- Vehicle has complex exhaust layout
Prevention:
- Regular inspection catches problems early
- Rust treatment extends muffler life
- Longer drives evaporate internal moisture
- Quality mufflers last longer initially
Problem 5: Broken or Worn Exhaust Hangers
Symptoms:
- Sagging exhaust components
- Rattling or clunking noises
- Exhaust scraping ground or hitting chassis
- Visible separated hangers
Common causes:
- Age and deterioration
- Heat exposure
- Excessive weight from other failing components
- Impacts or road hazards
DIY diagnosis:
- Visual inspection shows condition
- Sagging components indicate failure
- Cracks or tears visible in rubber
DIY solutions:
- Replace hangers (relatively easy DIY task)
- Support exhaust while replacing
- Ensure new hangers properly engaged
When to seek professional help:
- Hard-to-access hangers
- Need for welding or cutting
- Uncertainty about proper position
Prevention:
- Regular inspection identifies worn hangers
- Replace before complete failure
- Use quality replacement parts
Problem 6: Exhaust System Rattling or Noise
Symptoms:
- Rattling, buzzing, or vibrating noises
- Noise changes with engine speed or bumps
- Sounds may come from various locations
Common causes:
- Loose heat shields
- Broken internal muffler baffles
- Loose exhaust components
- Exhaust contacting chassis or body
- Worn hangers allowing excessive movement
DIY diagnosis:
- Locate noise source by having helper rev engine while you listen
- Check heat shields for looseness
- Inspect hangers and mounts
- Check for contact points between exhaust and chassis
DIY solutions:
- Loose heat shields: Tighten or secure with new hardware
- Loose components: Tighten clamps and connections
- Contact with chassis: Adjust position or replace hangers
- Broken baffles: Muffler replacement needed
When to seek professional help:
- Can't locate source of noise
- Repairs require welding
- Muffler replacement needed
Prevention:
- Regular inspections catch issues early
- Maintain proper tightness of all connections
- Replace worn hangers before they fail completely
Problem 7: Failed Oxygen Sensors
Symptoms:
- Check engine light with O2 sensor codes
- Poor fuel economy
- Rough running
- Failed emissions test
- Reduced performance
Common causes:
- Age (typical lifespan: 60,000-100,000 miles)
- Contamination from oil, coolant, or rich mixture
- Physical damage
- Electrical connection problems
DIY diagnosis:
- Read diagnostic codes
- Inspect sensor and wiring
- Check for contamination on sensor tip
DIY solutions:
- Replace failed sensors (moderate DIY skill)
- Use oxygen sensor socket for easier removal
- Apply anti-seize to threads on installation
- Clear codes after replacement
When to seek professional help:
- Sensors are seized and won't remove
- Uncertain about diagnosis
- Multiple sensors need replacement
Prevention:
- Address engine problems promptly (prevent contamination)
- Use correct fuel and oil
- Replace sensors at recommended intervals
- Protect sensors during repairs
When to DIY vs. When to Seek Professional Help
Knowing your limits is important for safety and avoiding costly mistakes.
Suitable DIY Tasks
These tasks are appropriate for most DIYers:
- Visual inspections
- Cleaning exterior surfaces
- Surface rust treatment
- Leak detection
- Checking and replacing hangers
- Tightening loose connections
- Replacing oxygen sensors (with proper tools)
- Applying protective coatings
- Minor clamp replacements
Requirements:
- Basic tools
- Safe work area
- Moderate mechanical aptitude
- Attention to safety
Tasks Requiring Professional Help
These situations warrant professional assistance:
Major component replacement:
- Catalytic converter replacement
- Muffler replacement (usually)
- Exhaust manifold replacement
- Flex pipe replacement
- Full exhaust system replacement
Welding and fabrication:
- Custom exhaust work
- Repairing sections requiring welding
- Fabricating custom solutions
Complex diagnosis:
- Intermittent problems
- Multiple simultaneous issues
- Unclear cause of symptoms
- Emissions-related problems
Safety-critical repairs:
- Major leaks before catalytic converter (CO hazard)
- Structural repairs to mounting points
- Issues affecting vehicle safety
Specialized equipment needs:
- Tasks requiring lifts (though jack stands work for most)
- Exhaust-specific tools you don't own
- Diagnostic equipment beyond basic OBD scanner
Legal/warranty concerns:
- Vehicles under warranty (DIY may void coverage)
- Emissions-related repairs in strict states
- Any repair you're uncertain about
Finding a Good Exhaust Shop
When professional help is needed:
Look for:
- Muffler/exhaust specialists
- Good reviews and reputation
- Fair pricing with written estimates
- Warranty on work performed
- Clear communication
Get multiple quotes for major work.
Ask about:
- Experience with your vehicle type
- Parts quality (OEM vs. aftermarket)
- Warranty coverage
- Timeline for completion
Red flags:
- Pressure to do unnecessary work
- Unwilling to explain repairs
- No warranty offered
- Prices far above or below market rates
Cost Considerations for Exhaust Maintenance

Understanding costs helps with budgeting and decision-making.
DIY Maintenance Costs
Initial tool investment: $150-300 for basic tools if starting from scratch
Ongoing supply costs:
- High-temperature paint: $8-15 per can (lasts multiple applications)
- Wire brushes: $10-20 (occasional replacement)
- Rust converter: $10-25 per bottle (lasts several applications)
- Penetrating oil: $8-15 per can
- Cleaning supplies: $20-30 annually
- Replacement hangers: $5-15 each
- Exhaust sealant: $8-15 per tube
Annual DIY maintenance cost: $50-100 typically
Professional Repair Costs
Inspection: $50-100
Minor repairs:
- Gasket replacement: $100-300
- Hanger replacement: $50-150
- Small leak repair: $75-200
Component replacement:
- Muffler: $150-500
- Catalytic converter: $500-2,500
- Oxygen sensor: $100-300 per sensor
- Exhaust pipes: $200-600 per section
- Complete exhaust system: $800-2,500+
Factors affecting cost:
- Vehicle type (luxury/import more expensive)
- Parts quality (OEM vs. aftermarket)
- Labor rates in your area
- Complexity of repair
- Additional damage discovered
Cost-Benefit Analysis
DIY maintenance value:
Scenario 1: No maintenance
- Muffler fails prematurely at 60,000 miles: $400
- Catalytic converter damage from neglect: $1,500
- Oxygen sensors fail early: $400
- Emergency repairs: $200
- Total: $2,500
Scenario 2: Regular DIY maintenance
- Tool investment: $250 (one-time)
- Annual supplies (5 years): $400
- Components last full lifespan
- Repairs planned, not emergencies
- Total: $650
- Savings: $1,850+
Time investment: 10-15 hours per year for regular maintenance vs. dealing with breakdowns, shop visits, and vehicle downtime.
Beyond financial savings:
- Reliability and peace of mind
- Vehicle knowledge and skills
- Avoiding emergency situations
- Confidence in vehicle condition
Advanced Exhaust Maintenance Topics
For enthusiasts wanting deeper knowledge:
Understanding Exhaust Gas Temperature
Monitoring exhaust temperature helps identify problems:
Normal ranges:
- Exhaust manifold: 800-1,200°F
- Before catalytic converter: 600-900°F
- After catalytic converter: 700-1,100°F (hotter due to exothermic reaction)
- Mid-system pipes: 400-600°F
- At tailpipe: 200-400°F
Temperature anomalies indicate problems:
- Much cooler than normal: Catalyst not working, significant leaks
- Much hotter than normal: Engine running rich, restricted exhaust
- Uneven temperatures: Blockages or restrictions
Performance Modifications and Maintenance
Modified exhausts require adjusted maintenance:
Aftermarket exhaust systems:
- May use different materials (stainless less rust-prone)
- Performance exhausts may run hotter
- Maintenance principles remain the same
- Check manufacturer recommendations
Headers vs. manifolds:
- Headers often use thinner materials
- May develop cracks more easily
- Require careful bolt torque
- Typically use exhaust wrap or coatings
High-performance considerations:
- Regular inspection more critical
- Heat management more important
- Performance gains depend on maintenance
Diesel Exhaust Maintenance
Diesel exhaust systems have unique components:
Diesel Particulate Filter (DPF):
- Requires regeneration
- Cannot be cleaned with traditional methods
- Failure requires expensive replacement
- Monitor warning lights closely
Diesel Exhaust Fluid (DEF) systems:
- Separate maintenance requirements
- See dedicated DEF system guides
Differences from gasoline:
- Different temperatures
- Soot accumulation
- Heavier construction
Frequently Asked Questions
How often should I inspect my exhaust system?
Visual inspection: Every 3 months or 3,000-5,000 miles for preventive maintenance. More frequently if you notice symptoms or drive in harsh conditions (salt, off-road, heavy loads).
Professional inspection: Annually or during regular service appointments for comprehensive checks, especially of hard-to-see areas.
After incidents: Always inspect after bottoming out, hitting road debris, or any impact to the undercarriage.
Can I drive with a small exhaust leak?
Short-term (days to a week): Usually safe if the leak is minor and behind the catalytic converter.
Not recommended if:
- Leak is before catalytic converter (carbon monoxide risk)
- Leak is large
- You smell exhaust in cabin
- Performance is significantly affected
Long-term: Even small leaks worsen over time, affect sensor readings, reduce performance, and waste fuel. Address promptly.
What causes exhaust systems to rust so quickly?
Internal moisture: The biggest culprit. Combustion produces water vapor. Short trips don't fully heat the exhaust, allowing moisture to condense inside components, rusting from the inside out.
Road salt: Extremely corrosive, especially in winter climates.
Material quality: Lower-grade steel rusts faster than stainless steel or aluminized steel.
Design: Some exhaust designs trap water in low spots, accelerating rust.
Prevention: Take longer trips regularly, clean road salt promptly, apply protective coatings, use quality replacement parts.
How long should an exhaust system last?
Typical lifespan:
- Exhaust manifold: Life of vehicle (unless cracked)
- Catalytic converter: 70,000-150,000 miles (or more with good maintenance)
- Muffler: 40,000-80,000 miles (varies widely based on conditions)
- Exhaust pipes: 50,000-100,000+ miles
- O2 sensors: 60,000-100,000 miles
Factors affecting lifespan:
- Climate (salt/humidity accelerate rust)
- Driving patterns (short trips accelerate rust)
- Material quality
- Maintenance
- Engine condition
With excellent maintenance: Components often exceed typical lifespan significantly.
Is exhaust sealant a permanent fix?
No—exhaust sealant is a temporary solution for minor leaks:
Appropriate uses:
- Very small pinholes
- Temporary fix until proper repair possible
- Supplement to mechanical repair (not replacement)
Limitations:
- Won't hold on larger holes or cracks
- Breaks down over time from heat cycles
- Not a substitute for replacing failed components
- May fail during pressure or temperature extremes
Best practice: Use sealant as a temporary measure while planning proper repair.
Can I fix exhaust rust with regular paint?
No—regular paint cannot withstand exhaust temperatures:
Requirements for exhaust coatings:
- Must be rated for 1200°F+ temperatures
- Specifically formulated for exhaust use
- Properly cures under heat
Regular paint will:
- Burn off when exhaust heats
- Provide no protection
- Create smoke and odor
- Potentially damage catalyst if fumes enter system
Always use high-temperature exhaust paint specifically designed for this application.
Why does my exhaust smell bad?
Different smells indicate different problems:
Rotten eggs smell: Sulfur from catalytic converter (normal to some degree, excessive indicates rich mixture or failing catalyst)
Raw gasoline smell: Unburned fuel (misfires, rich mixture, or catalytic converter not functioning)
Sweet smell: Coolant entering combustion chamber (head gasket, cracked head) – serious problem
Burning oil smell: Oil entering combustion (worn rings, valve seals, or turbo issues)
Exhaust fumes in cabin: Leak before catalyst allowing carbon monoxide inside – immediate safety hazard
How do I know if my catalytic converter is failing?
Symptoms of catalyst failure:
- Check engine light with P0420 or P0430 code
- Significant performance reduction
- Failed emissions test
- Rattling from catalyst (internal breakup)
- Very hot catalyst or glowing red
- Fuel economy drop
Testing:
- OBD-II scanner shows catalyst efficiency codes
- Temperature test (inlet vs. outlet temperatures)
- Backpressure test shows restriction
- Visual inspection for damage
Causes of failure:
- Contamination (oil, coolant)
- Engine misfires
- Rich fuel mixture
- Physical damage
- Age
Prevention: Maintain engine properly, address misfires immediately, use correct fluids, avoid driving through deep water when catalyst is hot.
Can I remove my catalytic converter?
Legally: No. Removing catalytic converters is illegal under federal law (Clean Air Act) and most state laws:
Penalties:
- Fines up to $2,500 per violation for individuals
- Higher fines for shops
- Failed emissions testing
- Vehicle not street-legal
Exceptions:
- Replacing failed catalyst with new one (legal)
- Off-road-only vehicles never driven on public roads (in some jurisdictions)
- Vintage vehicles manufactured before catalyst requirements
Technical impact:
- Check engine light permanent
- Illegal in most areas
- May affect O2 sensor operation
- Changes exhaust note
Bottom line: Keep your catalytic converter. If it's failed, replace it properly.
Should I upgrade to stainless steel exhaust?
Advantages of stainless steel:
- Significantly better rust resistance
- Longer lifespan (often 2-3x or more)
- Better appearance
- Can improve resale value
- Less maintenance needed
Disadvantages:
- Higher initial cost (50-100% more than mild steel)
- May require professional installation
- Still requires some maintenance
- Not immune to damage from impacts
Worth it if:
- You keep vehicles long-term
- Live in high-rust environment
- Want minimal maintenance
- Budget allows
Maybe not worth it if:
- Short-term vehicle ownership
- Budget-constrained
- Vehicle has low remaining lifespan
Alternatives: Aluminized steel offers middle ground—better rust resistance than mild steel, lower cost than stainless.
How do I maintain an aftermarket performance exhaust?
Same basics apply (inspection, cleaning, rust prevention) with additions:
Material-specific care:
- Stainless: Easier maintenance, can use stainless cleaner/polish
- Titanium: Extremely durable but expensive, minimal maintenance
- Mild steel: Requires diligent rust prevention
Heat management:
- Performance exhausts may run hotter
- Check heat shields regularly
- Consider exhaust wrap for headers
- Monitor clearances from heat-sensitive components
Hardware:
- Use quality hardware with anti-seize
- Check torque specifications
- Inspect regularly as performance exhausts may vibrate more
Gaskets:
- May require special high-performance gaskets
- Replace when removing components
- Follow manufacturer recommendations
Manufacturer guidance:
- Follow specific care instructions
- Many performance exhaust companies provide detailed maintenance guides
- Warranty may require specific maintenance
Conclusion: Making Exhaust Maintenance a Regular Habit
Your exhaust system is a critical component that deserves regular attention. While it might not be as glamorous as other automotive systems, proper exhaust maintenance delivers tangible benefits: improved performance, better fuel economy, reduced emissions, enhanced safety, and significant cost savings from preventing premature failures.
The key principles of effective DIY exhaust maintenance are simple:
Inspect regularly: Quarterly visual inspections catch problems early when they're inexpensive and easy to fix.
Clean consistently: Removing corrosive materials prevents the rust that destroys exhaust components.
Treat rust proactively: Address surface rust before it becomes structural damage.
Maintain proper alignment: Correct positioning prevents wear, noise, and damage.
Monitor performance: Pay attention to sounds, smells, and behavior changes that indicate developing problems.
Act promptly: Small issues become major failures if ignored. Early intervention saves money and prevents dangerous situations.
Know your limits: DIY what you can safely and competently handle; seek professional help for complex repairs.
Invest in quality: Whether tools, replacement parts, or professional service, quality pays for itself through reliability and longevity.
Creating a maintenance schedule helps ensure nothing is overlooked:
Every 3 months: Comprehensive visual inspection, leak check, basic cleaning
Every 6 months: Deep cleaning, rust treatment, alignment check, hanger inspection
Annually: Consider professional inspection for comprehensive assessment
As needed: Address problems promptly when detected
The time investment is modest—perhaps 10-15 hours annually for thorough maintenance—yet the returns are substantial. You'll avoid the inconvenience of breakdowns, the expense of premature component replacement, and the safety hazards of a failing exhaust system.
Moreover, performing your own exhaust maintenance builds valuable mechanical knowledge, increases confidence in your vehicle's condition, and provides the satisfaction of self-reliance. You'll develop the ability to identify problems early, understand what various shops are telling you, and make informed decisions about repairs.
Your exhaust system works hard in harsh conditions—exposed to extreme temperatures, corrosive materials, constant vibration, and the elements. Showing it some regular care ensures it continues performing its essential functions: protecting your engine, reducing harmful emissions, and keeping your vehicle running smoothly and quietly.
Start today with a basic inspection. You'll likely find your exhaust is in decent shape, and a few preventive measures will keep it that way. If you discover problems, you now have the knowledge to address them appropriately, either through DIY repair or informed professional service.
Remember: The exhaust system you ignore will eventually demand attention at the most inconvenient time and the highest cost. The exhaust system you maintain will serve you reliably for years to come.
Additional Resources
For more information on automotive maintenance and exhaust systems:
- Car Care Council - Free automotive care guides and maintenance schedules
- Family Handyman Auto Repair - DIY automotive repair and maintenance tutorials
